

在项目部署提测前,进行本地测试,常用方法:模拟接口请求测试,单元测试,断点调试(debug)。
Intellig IDEA中的断点调试
在Debug模式下,可以实时进行断点调试。
Debug视图 (此处为idea视图,不同编译器会有所不同):
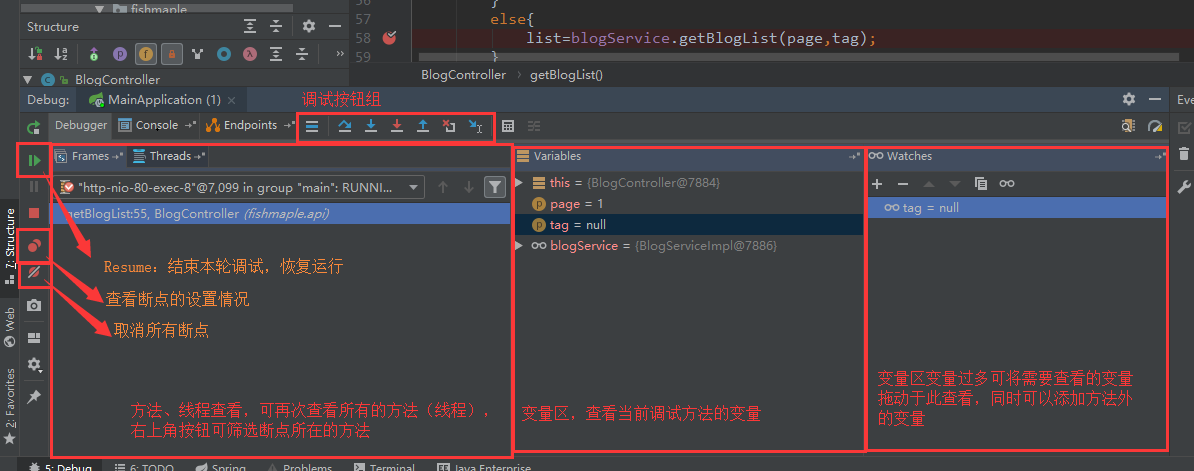
调试按钮组,自左至右依次为:
 :跳转到当前断点行;
 :Step Over(F6),步过,跳过该行继续执行;
 :Step Into(F7),步入,跳进当前执行的方法中,不会跳入导入的官方库方法中;
 :Force Step Into (Alt + Shift + F7),强制步入,能跳入任何方法,包括进入官方类库的方法。
 :Step Out (Shift + F8):步出,从步入的方法内退出到方法调用处,此时方法已执行完毕,还没有完成赋值。
 :Drop Frame:回退断点,回退到上一个方法的调用处。
 :Run to Cursor (Alt + F9):运行到光标处,将光标定位到需要查看的那一行,然后使用这个功能,代码会运行至光标行,而不需要打断点。
 :Evaluate Expression (Alt + F8):计算表达式,在调试中计算、显示某表达式的值或方法的返回值。
单元测试
正常情况下,在测试类中使用@Test即可通过Junit进行单元测试,在web项目中,测试需要添加一下相关支持。
以下是web项目中一个典型的TestCase
@RunWith(SpringJUnit4ClassRunner.class)
@ContextConfiguration(locations="classpath:applicationContext.xml")
public class BlogServiceTest{
    @Autowired
    private BlogService blogService;
    @Test
    public void testGetBlog(){
        List<Blog> blogs=blogService.getBlogList(2);
    }
}
在单元测试中使用Mockmvc
一个例子:
@RunWith(SpringJUnit4ClassRunner.class)
@ContextConfiguration(locations="classpath:applicationContext.xml")
public class BlogServiceTest{
    protected MockMvc mockMvc;
    @Autowired
    protected WebApplicationContext wac;

    @Before()  //这个方法在每个方法执行之前都会执行一遍(多个测试类可以集成同一个含有此方法的类)
    public void setup() {
        mockMvc = MockMvcBuilders.webAppContextSetup(wac).build();  //初始化MockMvc对象
    }

    @Test
    public void testGetBlog() throws Exception{
            String requestJson = JSONObject.toJSONString(new Blog("fish",1));
        String responseString = mockMvc.perform(
            post("/api/blogT")
                .contentType(MediaType.APPLICATION_JSON)    //数据格式
                .param("id","2")
                .param("name","fish")                        //传递url参数
                .content(requestJson)               //传递RequestBody参数
            )
            .andExpect(status().isOk())            //返回的状态是200
            .andDo(print())                 //打印出请求和相应的内容
            .andExpect(jsonPath("$.data.name", is("测试"))))  //检验返回的json属性值
            .andReturn().getResponse().getContentAsString();   //将相应的数据转换为字符串
    }
}
tips:
在使用MockMvc测试时,必须满足全部必要的请求参数(包括缺省参数),否则将抛出异常。
使用postman模拟请求
postman的下载可在官网Postman | Apps或本站工具箱:鱼鱼的工具箱
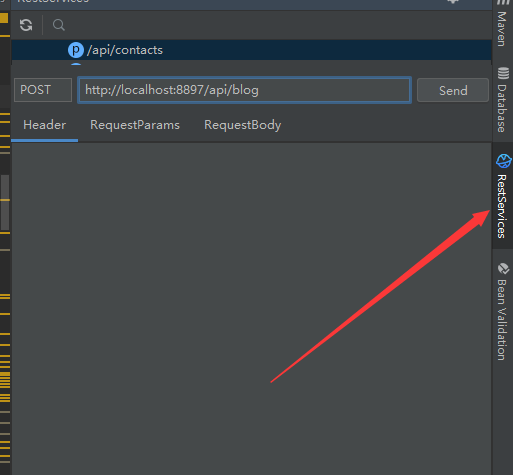
使用RestfulToolkit工具进行调试

在idea插件的Marketplace可以搜到这个插件,然后通过侧边栏方便的进行接口调试:
 2018-11-19鱼鱼